Ingrida Ivanciute DDS
24. aug 2007
• www.vivadens.eu
Koolitus: • Science, Art and Practice of Direct Aesthetic Restoration
Direct Esthetic Restoration - Esthetic Sense Stopped in Reality: Case Report
|
|
|
|
|
|
|
|
|
|
|
|
|
|
|
Abstract. Development of state-of-the-art dental materials and techniques allows more challenging defects in the anterior region to be successfully replicating natural dentition using direct aesthetic restoration method as an alternative to orthodontic treatment or more invasive indirect ceramic restorations. This case presentation describes the treatment of a client who presented with a crowded four upper front teeth and irregular dental arch.
The restoration was accomplished using free hand layering technique with a Microfilled Hybrid Resin Composite in a single appointment. The treatment restored teeth to optimum esthetic result, function and complete client’s satisfaction.
Clinical significance. This article presents a conservative, direct restoration approach as an alternative to orthodontic treatment allowing achieving esthetic smile rehabilitation while preserving tooth structure and involving as few teeth as possible, decreasing overall treatment time.
Case Report.
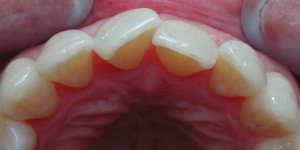
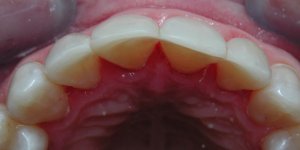
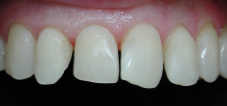
Case Presentation. A 42-year-old woman presented with severe crowding in the maxillary anterior region. She refuses orthodontic treatment and requested a less expensive, more limited treatment involving only the 4 incisors.The key factors in choosing direct esthetic dental arch restoration were: preserving natural tooth structure, minimal removal of healthy teeth structures, minimal invasion into gum tissues, satisfaction of esthetic desires as well as balance between treatment duration and price.
Preoperative Procedures.
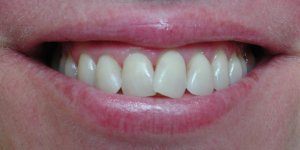
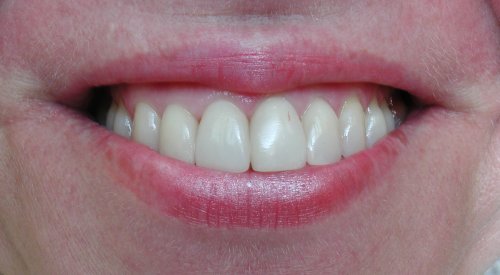
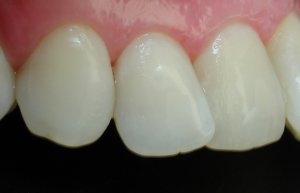
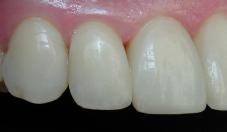
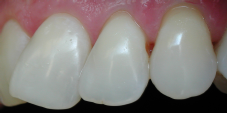
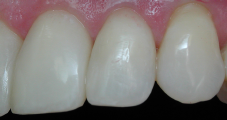
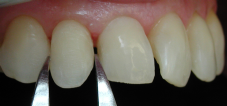
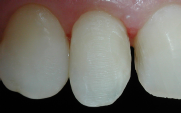
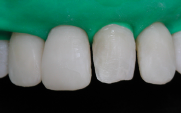
After professional oral hygiene, taking into account client’s desire for whiter teeth, teeth whitened using LaserSmile™ (Biolase Technology Inc.; San Clemente, CA), where approximately 35% of hydrogen peroxide was activated by 10 W laser 810 nm photons wave. Procedure time approximately 60 min. Tooth color change was from shade A3 to shade A1. After teeth whitening restoration had to be delayed for at least 2 weeks because of residual oxygen, which inhibits polymerization. Studies show that polymerization of adhesives is reduced after dentin bleaching, and delayed adhesive application reverses the polymerization inhibition. Polymerization rates return to normal levels when adhesives are applied to dentin 2 weeks after bleaching.*1 Digital photo registration EPSON Photo PC 3100Z was made of smile, frontal and lateral views of teeth, dental arch: preoperative (Figures 1-5), during procedures (Figures 11-28) and two weeks postoperative (Figures 6-10).
Clinical Protocol.
Teeth were cleaned with fluoride-free toothpaste (Zircate/Dentsply). Anesthesia was administered. The overall length of dental arch of ##7,8, 9,10 (international - 12, 11, 21, 22) is accurately measured using calliper (Figure 11) and following a golden proportion*2 the dimensions of future lateral and central incisors is determined – they will be narrower, because in the same dental arch it will be necessary to place “not-crowded” teeth. Datum line is a midline going through upper lip inclination and descending directly through a lobe of central incisors that makes a straight angle with a line of incisal edges.*2
|
|
|
A place of a midline is noted (Figure 12) making about 1 mm gap for teeth 8, 9 to be separated in between. Firstly, reconstruction of teeth 7, 8 (work term approximately 3 hours), then a break is anticipated, afterwards in analogous order by mirror reflection it is anticipated to reconstruct teeth 10, 9. Total term of reconstruction approximately 6 hours. The resection of excess teeth 7, 8, 9, 10 structures that are not in desirable trajectory of dental arch is performed, in lingual surface where composite’s adhesion is anticipated – enamel is roughened. (Figure 13).
|
| 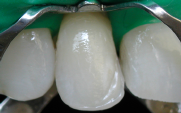 Fig. 14 | 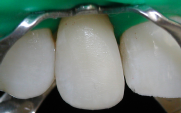 Fig.15 |
The rubber dam was applied on working area (teeth 5 -12). To assure a quality adhesion, precise composite transition near gum tissue and to make visualization easier, a rubber dam clasp was placed on a working tooth.
Acid-etching with 37% phosphoric acid (UltraEtch, Ultradent Products Inc.) is performed over both enamel for 30 seconds and dentine for 15 seconds, to remove diffuse barrier – smear layer which forms after dentine preparation – and to open collagen fibers. After rinsing acid with water for 30 seconds, adequate humidity control is important since the total dehydratation of dentin is contraindicated. On the other hand, an excessively wet dentin can jeopardize adhesion as much as the lack of humidity.*3
For phosphoric acid systems, a wet bonding technique is necessary to keep the collagen meshwork open for resin monomer penetration. Collapse of this network and exposure to air inhibits monomer penetration to the full depth of the decalcified dentin. Adhesive (Prime&Bond NT/Dentsply) was applied, that forms resin-infiltrated dentin. The resin-infiltrated dentin layer is thought to have lower elastic modulus than restorative resin, so its acts as an elastic buffering layer that minimizes the composite’s polymerization contraction stress.*4
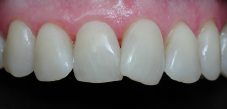
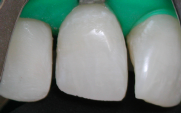
Adhesive was light cured for 20 seconds from closest distance possible, because resin-dentin shear bond strength decreases significantly as distance between the curing light tip to the adhesive increases, but lengthening the exposure time can compensate for this.*5 First of all, lingual tooth surface is recreated using microfilled hybrid resin composite GC Gradia Direct. On tooth 7 from lingual side translucent enamel NT (natural translucent) is applied achieving a desired form of incisal edge and tooth position within a dental arch (Figure 14).
In transition between lingual and facial tooth surfaces a Light-Cured Flowable Hybrid Composite (GC Gradia Direct Flo) was used as a liner and was light cured for 20 seconds. To apply flowable composites as a liner may be good way to improve contact with the preparation walls, reducing bubbles or gaps between the adhesive layer and the composite resin *6. Also the flowable composite liner reduces polymerization shrinkage stress and can act as a sort of “shock absorber” *7. Rest of facial surface is restored in following composite increments: dentin OA3, enamel A2 – in cervical area, and A1 – in the centre and incisal edge.
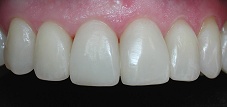
All facial surface is covered with translucent enamel NT (Figure 15). Increments of composite are applied in ~1-2 mm layers using not damaged tooth surface layer, inhibited by oxygen. Increment form is fixed with oriented light curing polymerization ~950 mW/cm2 470 nm wave light-emitting diode (LED) curing light (SmartLite iQ, Dentsply Caulk). Light curing for 10 seconds was made through the dental structure in an effort to lead polymerization shrinkage to the resin-contacted preparation wall and to obtain an enhanced marginal seal. At the same time to make a soft-start polymerization, that tend to generate a more homogenous pattern of contraction and better marginal adaptation with less resultant stress*8.
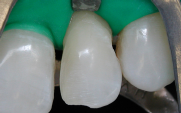
Final polymerization is accomplished by polymerizing directly to a fragment for 10 seconds. To maximize curing effectiveness, light guides should be maintained in close proximity to the surface of the light-activated restorative material.*9 After restoration of teeth 7, analogously teeth 8 is restored (Figures 16-18), after a break
|
| 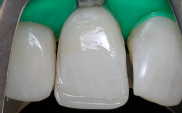 Fig. 17 | 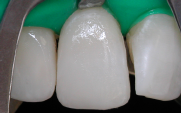 Fig. 18 |
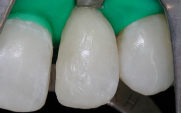
– 10 (Figures 19-20) and 9 (Figure 21-23). Using a medium size reflective wedge (Luciwedge Soft/ KerrHawe SA)
|
| ||
|
| 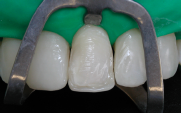 Fig. 22 | 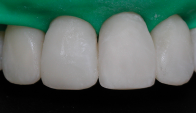 Fig. 23 |
and transparent matrices (Hawe Transparent Strip/KerrHawe SA) proximal surfaces of physiologic elasticity are restored – starting from lateral incisors towards a midline (Figure 24).
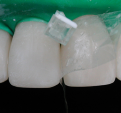 Fig. 24 | 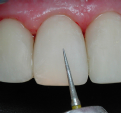 Fig. 25 |
The use of transparent matrices might afford a more adequate polymerization of the composite at the gingival area. Proximal surfaces are polished using finishing strips (VisionFlex Diamond Strips/Brasseler GmbH Co). With extra-thin strips it possible to enter the proximal embrasures and to properly finish the margins, obeying the proximal contour. With them a uniform surface smoothness is attained (Figure 25). Rubber-dam is removed. Static and dynamic occlusion is checked. With diamond points (T&F Hybrid Points/Shofu Inc.) occlusal adjustments are made.
Finishing and Polishing.
Polishing disc (Sof-Lex TM Extra Thin Contouring and Polishing Disc, 3M ESPE) was used to form the incisal edge. Facial and lingual surfaces are modeled with ultra-fine Diamant burs (T&F Hybrid Points/Shofu Inc.) (Figure 26). When tooth form basically matches natural tooth, surface is polished using Enhace/Dentsply system grit (Figure 27). After achieving complete smoothness of restored surface, it is polished with a rubber forms (Enhance/Dentsply) and proximal surfaces – with floss, first of all using Prisma Gloss, then - Prisma Gloss Extra Fine/Dentsply polishing pastes (Figure 28). An indicator of quality polishing – shininess of restored enamel like natural.
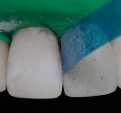 Fig. 26 | 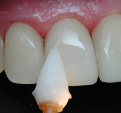 Fig. 27 | 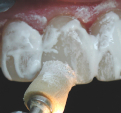 Fig. 28 |
CONCLUSIONS.
Understanding the client’s concerns, respecting and preserving natural tooth structure by using direct restorations may be considered as successful alternative to the traditional orthodontic treatment. It is up to the clinician to acquire a thorough knowledge of the restorative materials and follow their specific protocols to optimize the success of direct restorative procedures. Direct esthetic restorations rejoice a dentist, a professional creator of natural beauty. Mastering technique isn’t the end, but only a mean on a path. Intuition, creativity are necessary. That is an individual signature, frozen in time, an expression of your senses, your capacity to transform, bring an esthetic sense into reality.
Disclosure
The author does not have any financial interest in the companies whose materials are discussed in this article.
Ingrida Ivanciute, DDS
Aesthetic Dentistry Center „VivaDens“
Didlaukio str. 51 ,Vilnius LT-08303, Lithuania, EU
The article was published in Lithuanian Dental Chamber News (Dec. 2005 issue No. 4)
References
- Cadenaro M, Breschi L, et al. Influence of Whitening on the Degree of Conversion of Dental Adhesives on Dentin. Eur J Oral Sci; 2006; 114 (June): 257-262.
- American Academy of Cosmetic Dentistry. Diagnosis and Treatment evaluation in cosmetic dentistry, 2003.
- Pereira GDS, Paulillo LA, De Goes MF, Dias CT. How wet should dentin be? Comparison of methods to remove excess water during moist bonding. J Adhes Dent 2001; 3:257-262.
- Miyazaki M. Application of Hypochlorite to etched and dried dentin surface for optimum adhesion. Pract Proc Aesthet Dent 2005; 17 (9): 634-636.
- Xu X, Sandras DA, Burgess JO. Shear Bond Strength With Increasing Light-Guide Distance From Dentin. J Esthet Restor Dent; 2006; 18 (1): 19-28.
- Lopes GC, Vieira LCC, Araujo E. Direct Composite resin Restoration: a Review of some clinical Procedures to Achieve Predictable Results in Posterior teeth. Esthet Restor Dent 16:19-32, 2004.
- Effect of Resin Liners and Photoactivation Methods on the Shrinkage Stress of a Resin Composite. Cunha LG, Alonso RCB, et al: J Esthet Restor Dent; 2006; 18 (1): 29-37.
- Esthet Restor Dent 16:3-5, 2004 Leinfelder K. The enigma of dental amalgam.
- Vandewalle KS, Roberts HW, Andrus JL, Dunn WJ. Effect of Light Dispersion of LED Curing Lights on Resin Composite Polymerization. Esthet Restor Dent 17:244-255, 2005.

